- HOME
- PRODUCTS
- Surface Grinder
- Services
- Overhaul service
PRODUCTS
Surface Grinder
- Accuracy inspection
- 1976 years MSG-200(according to JIS B-6213) Unit:mm
-
Inspection item Measuring
methodPictorial
explanationTolerance Value before
overhaulValue after
overhaulLevelness of table top face Right and left directions Set the precision level on the top face of table and execute measurement. The maximum difference in the measurements at center and both ends shall be the measured value. 
0.02/m 0.014/m 0.01/m Forward and backward directions 0.02/m 0.025/m 0.01/m Straightness in table movement Right and left directions <on vertical plane> Set the precision level on the top face of table, move the table and execute measurement. The maximum difference in the readings at center and both ends shall be the measured value. 
0.02/m 0.02/m 0.003/m Forward and backward directions <on vertical plane> 0.02/m 0.025/m 0.008/m Parallelism of table in right-and-left motion, with the table top face being the reference Set the test indicator so that its probe touches the top face of table, move the table and execute measurement. The maximum difference in the readings of test indicator shall be the measured value. 
0.01/m 0.005/400 0.002/400 Parallelism of table or grindstone head in forward-and-backward motion, with the table top face being the reference Set the test indicator so that its probe touches the top face of table, move the table or the grindstone and execute measurement. The maximum difference in the readings of test indicator shall be the measured value. 
0.01/300 0.003/400 0.002/200 Parallelism of table in right-and-left motion, with the table or the grindstone head being the reference Set a square rule on the top face of table in parallel to the right-and-left motion of table, set the test indicator so that its probe touches another side of square rule and move the table is moved forward and backward. The maximum difference in the readings of test indicator shall be the measured value. 
0.02/300 0.023/200 0.003/200 Run-out on the face of grindstone shaft top end cone Set the test indicator so that its probe touches the face of top end cone perpendicularly and execute measurement by turning the grindstone shaft. The maximum difference in the readings of test indicator shall be the measured value. 
0.005 0.006 0.001 Parallelism between grindstone axis and table top face Stand a rule with circular face and flat base on the top face of table and set a test indicator to the grindstone shaft so that its probe may touch the circular face of the rule. Then turn the test indicator and obtain differences in the readings of test indicator. The larger one shall be the measured value. 
0.02/Turning diameter300 0.065/300 0.001/300 Perpendicularity of table in right-and-left motion, with the grindstone axis being the reference Set a square surface board on the top face of table in parallel to the right-and-left motion of table and measure. The maximum difference in the readings of test indicator shall be the measured value. 
0.02/Turning diameter300 0.014/300 0.002/300 Perpendicularity of grindstone shaft head in up-and-down motion, with the table top face in forward-and-backward motion being the reference Stand a rule with circular face and flat base on the top face of table and set the test indicator to the grindstone shaft so that its probe touches the circular face of the rule. Then move the grindstone shaft head and obtain differences in the readings of test indicator. The larger one shall be the measured value. 
0.01/100 0.04/100 0.005/100
- Overhaul service
-
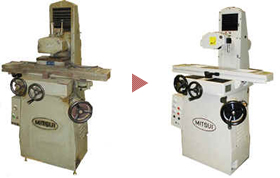
Your old surface grinder can be restored as good as new at a price of 60 to 70% that of a new machine.
As of October 2010, Mitsui has overhauled a total of 765 units, earning a high reputation from users.
- Merits of overhaul
-
- Old and deteriorated machine tools can be restored almost as good as new at a low price.
- Accurate restoration can be made in the best condition because the natural seasoning of castings (base, saddle, table, and column) is completed.
<The machine is well-broken in and any new adjustments can be done with very stable accuracy> - An overhauled machine is more convenient in use than a new one and loved by the user because it has been used for years.
*:While you entrust us for an overhaul, we are ready to lend a substitute machine for your convenience.
- Parts recommended to be replaced periodically
-
We recommend periodical maintenance so as to maintain accuracy and avoid trouble. Please feel free to consult us in case of abnormal sounds or problems with accuracy should any occur on your machine.
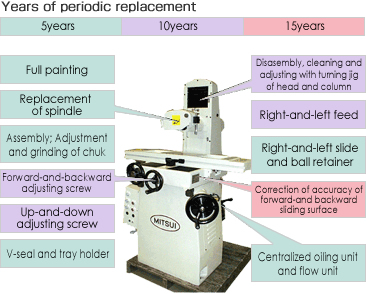
*The period till replacement is recommended based on 8-hour-a-day operation as a guideline.
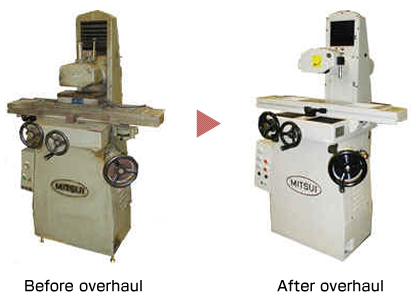
- Example of actual overhaul 1976years MSG-200M
-
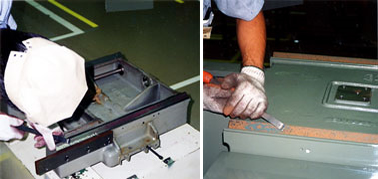
- Correction of sliding surface accuracy <Simultaneous sliding of base and saddle>
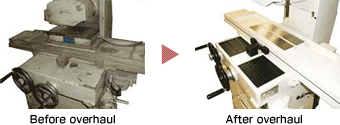
- Sliding surface having worn by a long time of use can be hand-milled and restored to a new sliding surface.
Furthermore accuracy as same as that of new machine can be regained by correcting the sliding surface accuracy and replacing the parts to be replaced periodically. In addition, inspection after overhaul is executed in the same manner as in a new machine.
- Top face of table
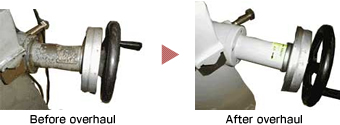
- Hand wheel section
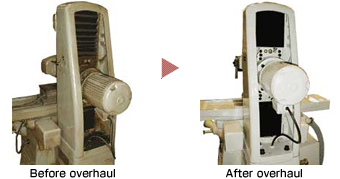
- Rear side of column
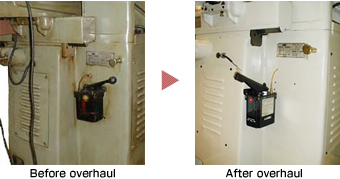
- Right side of base
- Other Services
